Comments
You can use your Fediverse (e.g., Mastodon) account to reply to this post .
Bitwarden is an amazing product. It is not only affordable, even free, but it is also open source. In this blog post we will outline a secure deployment of the, also open source, re-implementation of the backend logic Vaultwarden.
Vaultwarden is very light weight, free to use, comes with premium features and is implemented in Rust, if that matters. It is also compatible with all the official Bitwarden apps.
This article is not a step by step guide how to deploy and configure different parts, but an overview how a potential deployment could look like. It is very opinionated, but may provide you with some pointers how to improve your own deployment.
In this article we don’t cover how to backup your Vaultwarden instance. This is a very important topic and you should have a strategy in place that doesn’t undermine your security but guarantees access if you lose your Vaultwarden instance.
Before we get started we will outline the overall network architecture and how access is limited on a need-to-access basis.

The edge firewall, here depicted as rack server, assures that access to different network segments are enforced. For the vaultwarden deployment the most important part is that every access to the Vaultwarden instance needs to go via the reverse proxy (HAProxy with IP 192.168.100.1). Keep in mind that traffic between hosts in the same subnet does not cross the firewall and limitations can’t be enforced. This is one of the main reasons why the network is segmented as it is.
The reverse proxy provides a valid TLS certificate, encrypting all the traffic from the clients to the reverse proxy. Note, that the domain is valid, but points via internal DNS to an internal (RFC1918) address, it is not routable from the internet. In order to get a valid TLS certificate we create a temporary DNS entry to proof ownership. This does not add or change the vault.example.org DNS entry, but adds a _acme-challenge.example.org DNS entry that is removed as soon as the certificate is issued. For more information checkout Let’s Encrypt’s DNS 01 challenge documentation. Conveniently our pfSense deployment does not only provide HAProxy, but also provides Let’s Encrypt integration, supporting this flow. In this example we are using Cloudflare as our DNS provider, but chances are high your DNS provider is supported too.
Clients can either access Vaultwarden via the internal LAN - excluding guest, IoT and other “non-safe” networks - or from outside the network via a Wireguard tunnel. Wireguard does not respond to any unauthorized request and is hence invisible until the right asymmetric keys (and if configured a pre-shared key) is provided.

The screenshot above shows the Wireguard rule on the WAN interface. If you are not opening any other ports you are basically undetectable by port scans, no matter how aggressive they are.
After you setup all your users and configured your instance make
sure that you set SIGNUPS_ALLOWED="false" to deactivate user
registrations. Do NOT set the ADMIN_TOKEN to deactivate the
admin interface. Make sure your email notifications are working
by configuring the SMTP_* variables. Sendgrid
provides a free tier that should be plenty for email notifications
and works very well in practice. An alternative is the free tier
of Amazon SES.
Both are easy to setup and pretty robust in my experience.
In order to get the real, internal IP and not the proxy IP via
e-mail set the Vaultwarden environment variable to IP_HEADER=X-Forwarded-For
and configure your pfSense HAProxy frontend as shown below.
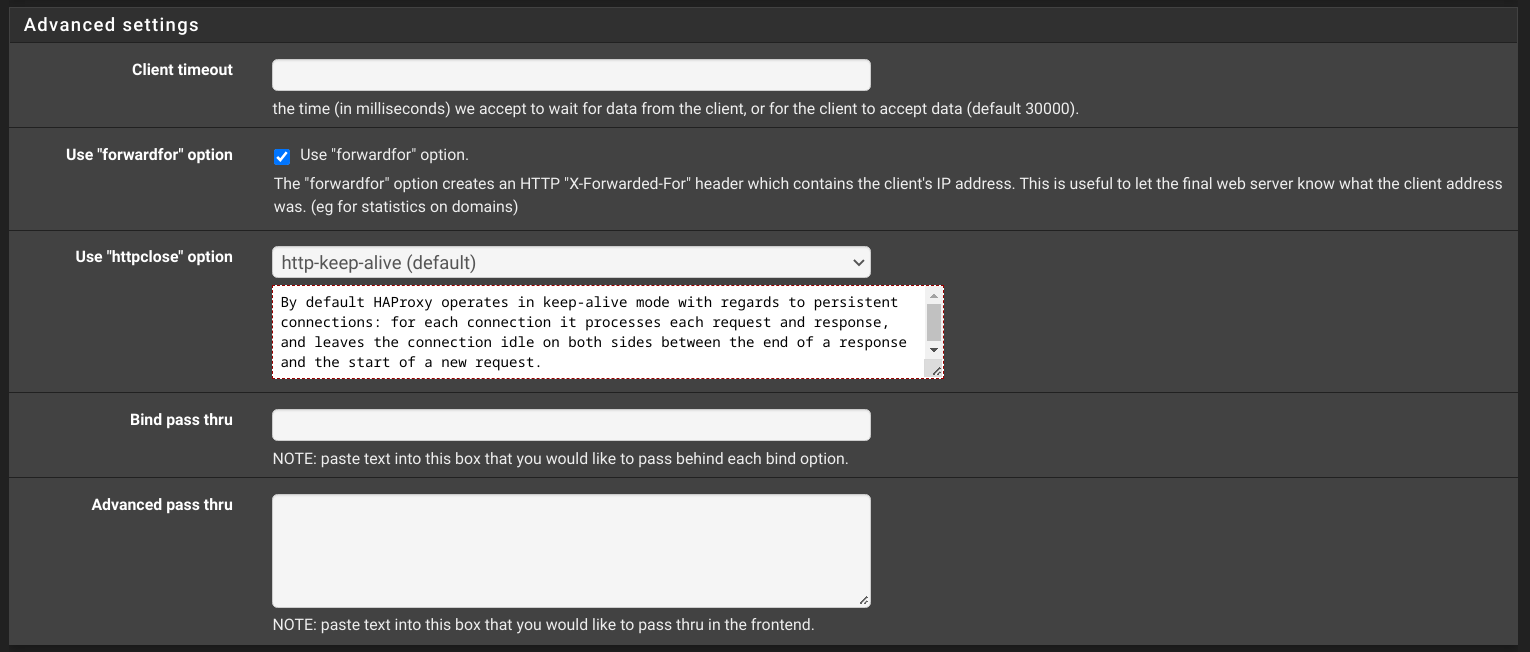
If you configure HAProxy without the pfSense interface add the following
line to your frontend block: option forwardfor. This will set
the X-Forwarded-For to the clients IP address. The user’s IP address
is either the LAN IP or the IP of the wireguard tunnel.
Webauthn in comparison to other 2-FA methods is able to prevent mans-in-the-middle attacks where the user is tricked into typing in their credentials and the 2-FA codes on a website that looks similar, but is controlled by an adversary. By leveraging public key (asymmetric) cryptography such attacks are prevented.
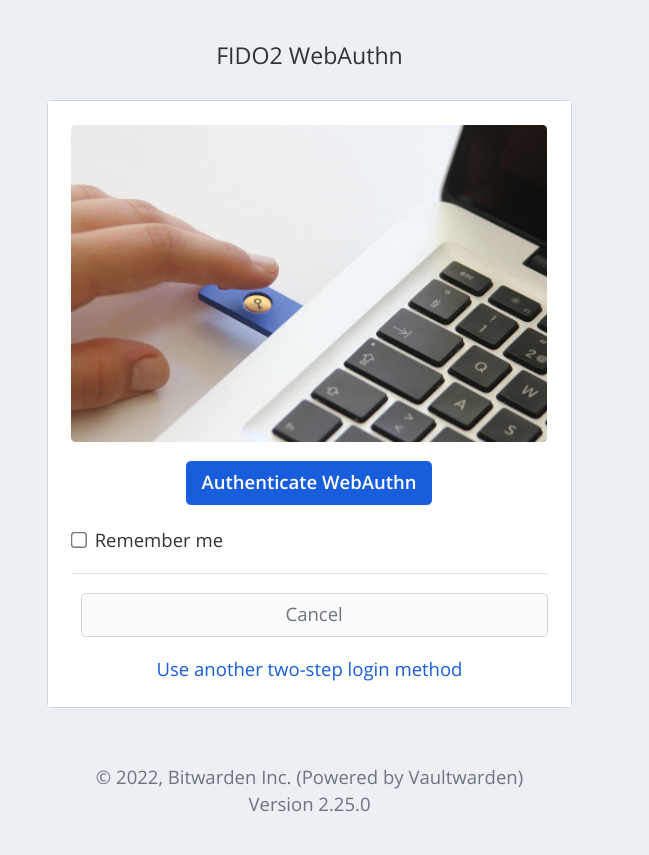
The official iOS/Android Bitwarden apps and the browser extensions I tested support Webauthn. Make sure you have at least one backup key and/or the recovery key stored in a safe place. If you do you can deactivated all other, weaker forms of 2-FA authentications.
The above outlined deployment hopefully gave you some ideas how to deploy your own Vaultwarden. With a setup like this you profit from different layers of security.
By introducing different layers of security and by using a strong password/passphrase to protect the data, with backups additionally encrypted and with hardware security tokens and network segregation it is very difficulty to breach your password manager.
Even a publicly exposed Vaultwarden with a strong password and strong 2-FA via Webauthn is very secure. All the other network and operational security mechanism, the introduction of different layers that need to be breached and the tunneling of all the traffic from the outside through a battle tested and secure VPN tunnel brings the security of this setup to the next level.
The usability for the end-users is nearly identical as without VPN tunnel. At least on iOS the Wireguard app can be configured to connect automatically and performance loss is not as bad as with OpenVPN and alternatives. Of course that only works if your connecting internet speed has a good download and upload speed. Also the roaming works in a frictionless way, given that the tunnel is state-less via UDP.
In conclusion, such a setup may be to extreme for your use case, but it is good to know that it is relatively easily achievable if you run your own Homelab and you are planning to deploy a password manager.